

I have been experimenting using chalk paste lately with stencils to add a bit of a personal touch to re-purposed furniture pieces. I would recommend trying this out next time you get a chance. I like chalk painting with stencils but find that they tend to bleed though at times if I put a little too much paint on my brush. I could use a spray adhesive to help with this but the less work I have to do the better.
We carry Chalk Paste and I have loved using it on fabric and on little items so thought I would use it on some furniture. Overall I was very happy with the results and found it super quick and easy to control.
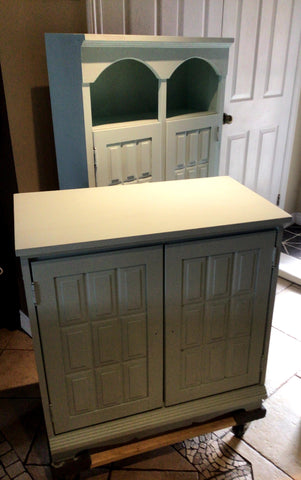
So I picked up this cabinet and thought it might work well for this. I was looking for a cottage or country farm house look because it was scratched up, had a bumpy an uneven finish and was somewhat dented.

It came in and went though inspection as usual.....

Gave it a really good clean...and placed both pieces on their own dolly's. Dolly's are so worth it! If you don't have one I would highly recommend them. It makes painting so much easier.

Next a couple coats of paint....
I let dry overnight, then dry brushed an accent color to give it a county washed look...

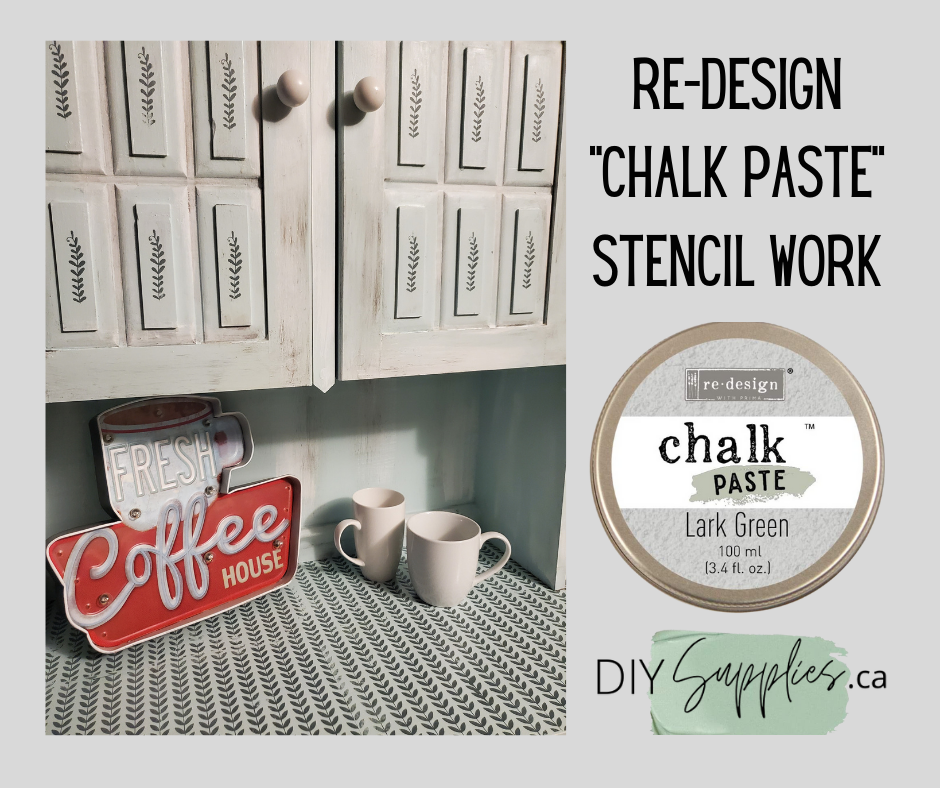
Once I was happy with the dry brushed white washed look it was time to pick out a stencil and some chalk paste. I really like the farmhouse look right now and it is fun to use a stencil with this style because it can look uneven or not perfect but still look great. So I went with "Botanical" It's a set of 3 stencils. I used just a single leaf from the first stencil and the leaf pattern that was included.

"Antique sage" seemed like a good choice to stand out on my base color and because it was a leaf design it seemed to make sense to me.

These silk screen stencils are new arrivals so I was happy to give them a try.
They are slightly sticky on one side. When you pull them off the sheet be sure to keep this piece because after using the stencil you can clean it let it dry and place it back so it stays sticky.

Just place the stencil down where you want to start. I used painters tape as well on the edges so I would not get any of the paste over the edge of the stencil.

Then use a silicone scraper to rub the paste over the stencil. I lifted the stencil and moved it and repeated. I waited 20 minutes between moving the stencil to the next area so my painters tape did not smudge the chalk paste. I also took the time to wash the stencil with warm water so the paste did not dry on the stencil between uses. Just wash and lie it out flat stick side up and it dries super fast for the next use.

While I waited for the top of the counter to dry, I worked on the leaf design. It was super fast. I taped up my stencil so just the leaf I wanted showed and moved it from square to square rubbing a bit of chalk paste across it each time.
This was super fast and I really liked the way it turned out.

Then I added some Colorantic Grey Storm Wax here and there to give it a more worn look. I waited overnight again and gave it a clear coat to protect it. It is not totally necessary, as I think it would look just as nice if it started to wear but I like to clear coat counter tops as they usually will get wiped down often.

Hope you enjoyed,
Andrea Hinz